
Self Hosting
This guide is meant to get you started with self-hosting a forumify instance. While you are in the right place if you already have server infrastructure, if you are not familiar with hosting websites, we recommend taking a look at our hosted options instead.
Preparing your server
To run forumify, you will need a server that supports SSH or any method to access the command line interface. We will be using ubuntu server as an example but you can pick your own flavor. These instructions should also work on Windows.
This guide will focus on running forumify using docker. If you'd rather not use docker, there is nothing preventing you from running it on a typical LAMP/WAMP stack. All you need is a webserver (apache/nginx/..), a PHP runtime and a MySQL database. If you also want to build your dependencies locally, you will need composer and nodejs.
The primary supported method for running forumify is by using docker.
Ensure docker is installed on your server:
$ docker -v
Docker version x.x.x, build xxxxxx
(If you don’t have docker installed yet, please get it from here.)
Create a directory in which your docker stack will live, if you already have other docker stacks, you could add it to an existing one as well. For this guide, we’ll start from scratch in your home directory.
$ mkdir ~/web && cd ~/web
If you plan to extend or modify forumify apart from using plugins we recommend forking the forumify production template and cloning it into ~/web/forumify.
This way you can git pull your changes onto your server and redeploy when needed. See development setup guide for more info.
Configuring docker compose
Inside the web folder, we’ll create our docker-compose setup.
Before we can run forumify, we need to configure some dependencies. We’ll start by writing a docker compose file to define our configuration:
$ touch docker-compose.yml
Open this docker-compose.yml with your favorite text editor and paste the following boilerplate:
services:

volumes:
MySQL
If you already have an external MySQL server, you can skip this step.
Modify the file as such:
services:
    mysql:
        image: mysql:8.4
        container_name: mysql
        ports:
            - '3306:3306'
        environment:
            MYSQL_ROOT_PASSWORD: 'root'
        volumes:
            - database_data:/var/lib/mysql
        restart: unless-stopped

volumes:
    database_data:
Now launch the stack:
$ docker compose up -d
✔ Container mysql  Started
If the docker compose command does not work, you have to install the docker-compose-plugin first.
If everything went well, you now have a MySQL server running on your system. Now let’s create the database and the user that forumify will be using. The easiest way to do so is to connect to your MySQL server using a GUI client, such as DBeaver, Navicat,… but for the sake of staying as generic as possible, we will be using the mysql client command that is available on most linux distros. If it’s not installed yet, please install it and connect to your server:
$ mysql -uroot -proot -h127.0.0.1
mysql>
By default, the root user is only accessible on localhost, so on the computer that the server is running on. If you want to use a GUI client from your local computer to connect to a remote server, you should connect through an SSH tunnel to your sever, most clients will have this option, and then connect to localhost:3306.
Let’s create a user named forumify that can access our forumify database, take note of the user’s password because you will need it soon.
$ mysql -uroot -proot -h127.0.0.1

mysql> CREATE USER 'forumify'@'%' IDENTIFIED BY '<new user password>';
Query OK, 0 rows affected

mysql> GRANT ALL PRIVILEGES ON forumify.* TO 'forumify'@'%';
Query OK, 0 rows affected

mysql> exit
Bye
Giving users access from anywhere is generally not a good security practice if you also plan to expose your MySQL server to the world (open host port 3306). If you need access to your database from a remote location, use an SSH tunnel. Also use an external docker network to limit access of the forumify user.
You should also change the password of the root user to something more secure than "root".
Forumify
With mysql ready to go, the next step is to add forumify to our docker-compose file.
services:
    mysql: ...

    forumify:
        image: forumify/forumify:latest
        container_name: forumify
        ports:
            - '8000:80'
        environment:
            - APP_SECRET=<not-a-real-secret>
            - DATABASE_URL=mysql://forumify:<replace me>@mysql:3306/forumify?serverVersion=8.4.0
            - MAILER_DSN=sendmail://default
        volumes:
            - ./forumify:/usr/src/app
        restart: unless-stopped

volumes:
    database_data:
Before launching this, we need to configure 3 environment variables as these are different for every install, these are found in services.forumify.environment in the file above:
APP_SECRET: <not-a-real-secret>- Set this value to a randomly generated string. From the Symfony documentation: “This is a string that should be unique to your application and it's commonly used to add more entropy to security related operations. Its value should be a series of characters, numbers and symbols chosen randomly and the recommended length is around 32 characters.”
DATABASE_URL: mysql://USER:PASSWORD@HOST:PORT/DATABASE?serverVersion=VERSION- Change the highlighted sections according to your configuration.
MAILER_DSN: sendmail://default- This is the way your platform will send emails. See Symfony Mailer.
You can find your MySQL server version by executing the query SELECT VERSION();.
Now we can launch forumify.
$ docker compose up -d
 ✔ Container forumify             Started
 ✔ Container mysql                Running
It will take a little while for the platform to launch for the first time. You can inspect its progress by checking the logs:
$ docker logs -f forumify

...
[OK] Cache for the "prod" environment (debug=false) was successfully warmed.
CRIT Server 'unix_http_server' running without any HTTP authentication checking
Once you see those 2 lines at the end of the output, the platform has successfully launched.
Now we can use the platform install command to set up some initial values and create an admin user:
$ docker exec -it forumify bash -c "/usr/src/app/bin/console forumify:install"

...
[OK] forumify configured successfully!
To verify that forumify is running, we can use docker ps to see that forumify is running on port 8000 (0.0.0.0:8000->80/tcp). You can use curl or wget on your server to see that it is indeed running:
$ curl http://localhost:8000

<!DOCTYPE html>
<html lang="en">
...
Exposing forumify to the outside
To expose forumify, we will be using another docker image. So let’s add it to our services in docker-compose.yml:
services:
  mysql: ...

  forumify: ...

  proxy-manager:
    container_name: proxy-manager
    image: 'jc21/nginx-proxy-manager:latest'
    ports:
      - '80:80'
      - '443:443'
      - '81:81'
    volumes:
      - ./proxy-manager/data:/data
      - ./proxy-manager/letsencrypt:/etc/letsencrypt
    restart: unless-stopped

volumes:
    database_data:
This nginx-proxy-manager is a nice graphical user interface to set up nginx proxies. This proxy will catch all communication coming in from port 80 and port 443, and route it to the correct docker container, in our case, the forumify container. It will also allow us to easily set up an SSL certificate for HTTPS network traffic using Let’s Encrypt.
Let’s bring up the new container for proxy-manager
$ docker compose up -d
 ✔ Container proxy-manager        Started
 ✔ Container forumify             Running
 ✔ Container mysql                Running
Port 80, 81 and 443 need to be open to TCP traffic. At this point you must have a domain and it must be linked with an A record in your DNS zone to your host’s public IP address. If you do not have a domain yet, you can not continue with this documentation but you can modify your docker-compose to run forumify on port 80, or open port 8000 and use the IP address directly.
Now open up a browser window and navigate to http://example.org:81, this should bring up a login screen for proxy-manager. The default credentials are:
email: admin@example.com
password: changeme
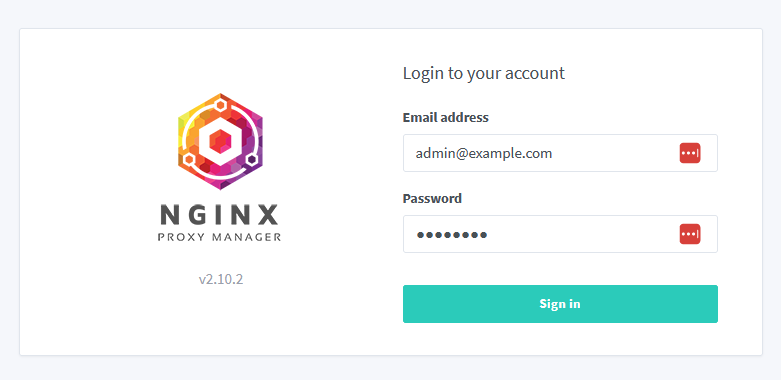
First you will be prompted to change the example email and password. Do so.
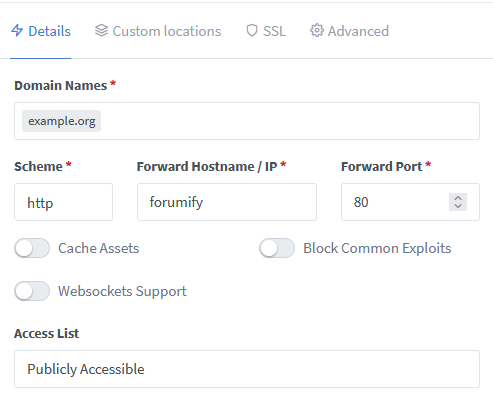
Next, go to the “hosts” tab, select “Proxy Hosts” and click “Add Proxy Host”.
In the details tab, fill in your domain names that should link to forumify, set the scheme to HTTP, forward hostname should be the name of your forumify docker container, in this case “forumify”. And forward port should be set to 80.
Then navigate to the SSL tab, for the SSL certificate select “Request a new SSL Certificate”, ensure the email is correct, and agree to the let’s encrypt ToS.

Finally, press “Save”.
If everything went well, you should now see a record in your Proxy Hosts with the correct domain, a Let’s Encrypt certificate, public access and status “Online”.
When you now go to your domain using HTTPS (https://example.org), you should see forumify’s welcome page.
Congratulations! You now have a forumify instance running in production mode on your server.