
PERSCOM.io
Seamlessly integrate PERSCOM.io into your forumify instance.
Package name for manual installation: forumify/forumify-perscom-plugin
Settings
After installing and activating the plugin, open the plugin settings by clicking the "Manage" dropdown and selecting "Settings".

- Endpoint: https://api.perscom.io/v1
- PERSCOM ID: Can be found on PERSCOM.io under "System" > "Settings"
- API Key: Needs to be created on PERSCOM.io under "System" > "API"
- The plugin will be modifying your PERSCOM.io data so it needs access to all scopes do so.
- Tip: you can select the first one, then hold shift and select the last one
Save the configuration. You can check if your installation was done correctly by selecting PERSCOM > Users in the admin panel and verify you can see your PERSCOM.io users.
Menu Builder
The PERSCOM.io plugin comes with a new menu type you can add in your menu builder named "perscom". This menu entry will automatically check if the user has a PERSCOM.io account and is eligible for enlistment. If they are eligible for enlistment, it shows the enlistment form. If not, it shows the operation center instead.
Configuration
Enlistment
Users that sign up to your website should not need access to PERSCOM.io, so the entire enlistment process is encapsulated within forumify. On this page you can modify the plugin's behaviour when it comes to enlistments and if it should automatically post the enlistment in a forum or assign a default role if you want make your enlistments forum only visible to enlistees and recruiters.
If you wish to use enlistments, you must create a form on PERSCOM.io that contains all the fields you wish to ask during the enlistment. When a user creates an enlistment, a submission will be made (Admin Panel > PERSCOM > Submissions > "Your Enlistment Form Name"). From there the enlistment can be accepted or denied.
Users
The forumify plugin will attempt to link existing users on PERSCOM.io to your forumify users by matching their email addresses. If a user uses a different email on forumify, you will have to modify their email on PERSCOM.io to match their forumify email.
All types of records can be created from within forumify. So your day-to-day actions can all be managed from within the forumify admin panel.
While generally your personnel will not require the use of PERSCOM.io, their user must exist on PERSCOM.io as it will be used for auditing on PERSCOM.io's side. They do not require any special permissions on PERSCOM.io, the forumify plugin does not respect any PERSCOM.io permissions.
Submissions
When users create submissions through PERSCOM.io forms they will be visible in the forumify Admin Panel under Submissions. Each form will get its own entry in the PERSCOM menu. And you can update statuses, add comments, etc from within forumify. The user will receive a notification when their submission gets updated, and it will show up in their operations center.
Every form will be shown on the operations center except for the enlistment form. So users can submit their personnel action requests from within forumify and review their status.
By default the plugin mutes all emails that are sent to the user through PERSCOM.io in favor of its own notifications and emails. You should always manage submissions through forumify to ensure your users are getting the notifications from your website instead of PERSCOM.io.
Operations Center:
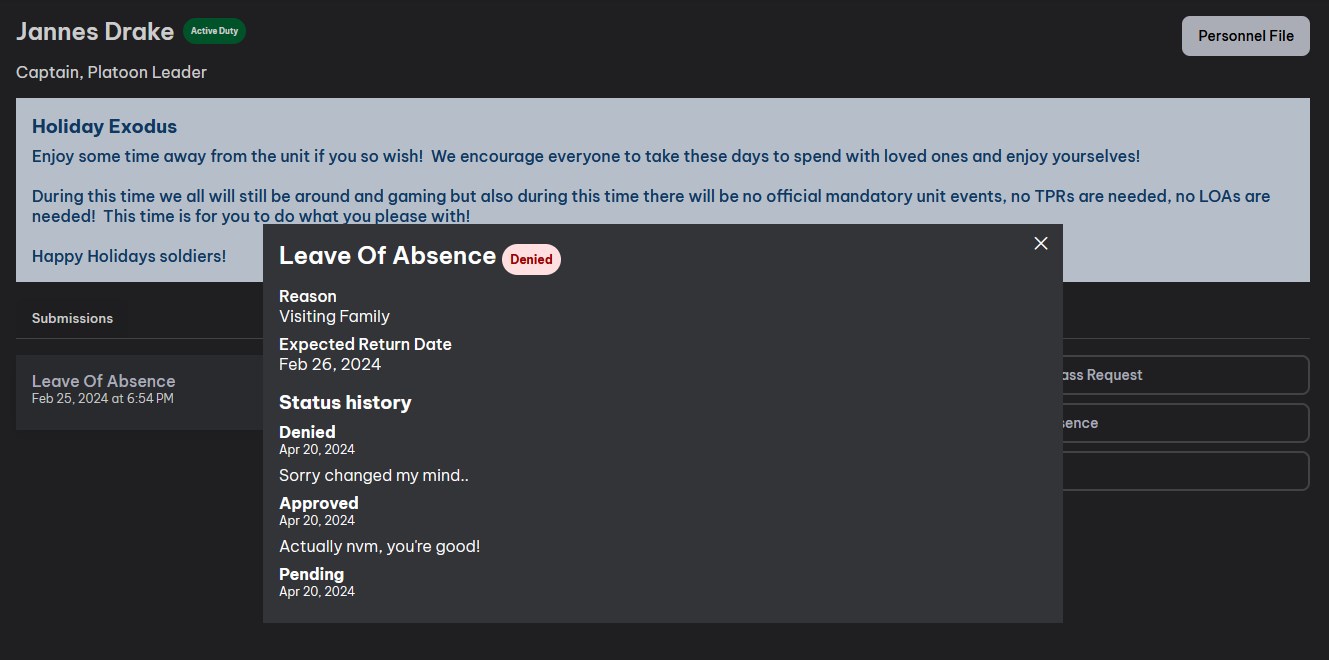
Due to a PERSCOM.io limitation a status can only appear once on a submission. If you have a submission that gets the following statuses in this order:
- pending -> approved -> pending -> denied
The first pending will be replaced by the second one and it will show as:
- approved -> pending -> denied
So if you have a process where you have multiple "pending" statuses, you should have a separate status for each step.
Organization
For now the organizational parts of PERSCOM.io are read-only on the forumify admin panel. While day-to-day business can be conducted from within the admin panel, more advanced changes like creating units, groups, documents,... require the use of PERSCOM.io.
Invision Community Migrator
In an effort to save time when moving from Invision Community's PERSCOM plugin to PERSCOM.io in combination with forumify a small migration script was created.
You can download the latest .tar from the releases page. For instructions on how to install applications in Invision Community, please check their documentation.
Once you install this application in your Invision Community admin panel a new tab will appear on the left side ().
Settings
Very similar to the forumify plugin settings.
Migrate
It is advised to use the status blacklist to ignore users that you do not wish to transfer. If you have a lot of users, you can also use it to batch process users per status to circumvent timeouts and perform manual checks.
Depending on the amount of data the script may time out. It is advised to increase your web server's timeout from 30 seconds to at least 20 minutes for this process.
Reach out to your website's host if you need assistance with this. You will need to increase Apache/nginx's timeout as well as PHP's max_execution_time.
If you do not see the result page after pressing migrate and your browser has stopped loading, the script may still be running in the background. If you press migrate again while the script is still running you might end up with duplicate records on your users!